Outdoor Project Planning Phase 4: Installation
Special Note: This is the fourth blog of a five-blog series to help you continue on the path to planning your project. In the first phase, “Inspiration and Budget Planning,” we discussed five milestones that need to be completed before you select a contractor. In the second phase, “Move Forward with Your Dream Project,” we provided tips for finding a contractor and finalizing your contract. In the third phase, “Visualize Designs and Turn Ideas into Plans,” we familiarized you with design recommendations and developing a design plan. From the first four phases to the last phase of “After Installation,” these blogs will help guide you every step of the way.
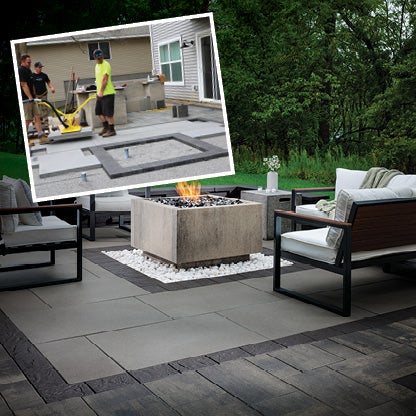
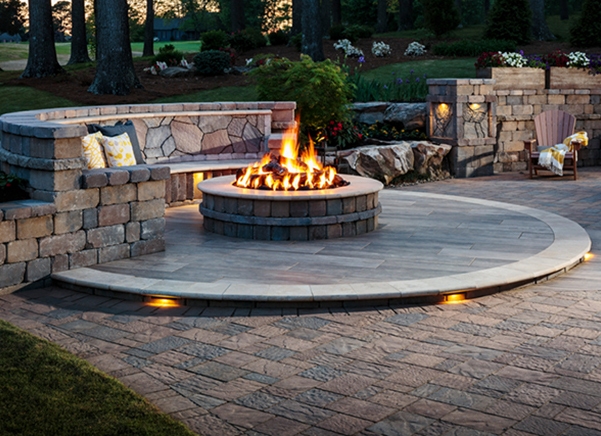
After your design plans have been drawn up and finalized, it’s time to get ready for installation. What’s more exciting than seeing your dream outdoor project come to life before your very eyes? Plan for the work to take up to 12 weeks. Keep reading to find out what questions you should be asking and the preparations you need to make prior to your installation. You will also find out what to expect as work gets underway.
. . .
8 Action Items as You Get Ready for Installation

Before installation, you will want to prepare for the process ahead. From building a fire pit, patio or driveway to installing an outdoor kitchen, here are eight action items you will want to act on:
- Ask if there may be any possibilities of damage to your lawn or landscaping. Find out how this will be resolved. Tip: If your plans include work in both the front yard and backyard, be sure to have the work done in the backyard first. This ensures that any work to be completed in your front yard will not be damaged.
- Ask for a timeline: you’ll want to know what will be completed day to day. This will help you plan your activities around the project. Note: The length of time your project will take varies depending on its scope.
- Find out what your contractor’s access needs are as you get ready for installation. You can then plan to remove any vehicles or other objects that would be in the way of any heavy equipment that may need to be brought in.
- Check to see if the correct materials were ordered and arrived. As products are being delivered, you’ll want to give your contractor a heads-up.
- Ask about any potential roadblocks that may come up during the process, so there are no surprises.
- Take your city’s weather patterns into consideration before setting installation dates. If there is an annual wet season that you can count on, you’ll want to bump your project to months when the weather is more conducive for getting work done.
- If you’re planning to add additional features in the future, let your contractor know. They can then provide any needed footings or utilities under the hardscapes. Note: This may increase the cost of the project, but it will save you time and money in the long run.
- Give your neighbors a heads-up about your project and let them know when the construction will take place. This helps them know when they may be inconvenienced, especially if you’re having a paver patio, driveway, or a large outdoor project installed that produces commotion.
Installation Days are Here. What You Should Expect
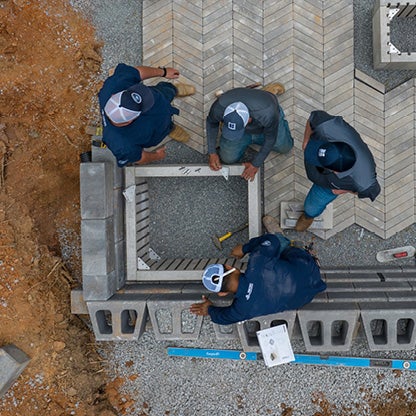
Among the expectations as you get ready for installation, is knowing that a project involving hardscape installation entails a multi-step process and requires time. This includes excavation and installing layers of aggregate, bedding sand, hardscapes and jointing material. Each of these steps is important for a successful project.
Expect lots of dirt, mud and uneven ground. You’ll need to take precautions, especially when you are walking through the work zone. Be on the lookout for any hazards, such as materials on the ground and machinery. Follow safe paths around the site and keep out of the way as the work is being done. Keep children and pets out of the worksite to ensure their safety.
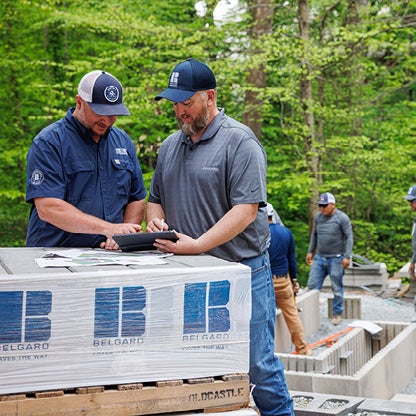
You’ll need to expect the unexpected, such as harsh weather. Allow time for the contractor to work through any issues that come up. Communication is key, so that you are on the same page as your contractor. Be in contact with your contractor throughout the project. This ensures that you will know how the project is progressing and are aware of any hurdles they are encountering.
Be sure to make these action items a top priority as you get ready for installation. So, go ahead and plan, make preparations and talk to your contractor. Knowing what to expect will give you peace of mind before your project gets underway. These preparations will also go a long way in making your project a success.
. . .
For more information on planning your project, visit our outdoor planning page. Watch for more helpful tips and advice in the next blog of this series: Phase 5: After Installation.